How to Melt and Repackage Shea Butter Without it Becoming Grainy
Asked by: aromaandco
On: June 02, 2015
Product Type:
Cosmetics
Answered
Question
When melting 100% Shea Butter for repackaging, I've noticed that it sometimes becomes grainy or sandy after it solidifies. Why does this happen, and what is the correct method to melt and repackage it to ensure it remains smooth?
Answer
How to Melt and Repackage Shea Butter for a Smooth Texture
When melting Shea Butter for repackaging, the key to avoiding a grainy texture and ensuring it solidifies properly is to control the temperature.
- Avoid High Heat: Melting Shea Butter at too high a temperature causes it to become completely liquid. When it cools and re-solidifies, the fatty acids can crystallize unevenly, resulting in the undesirable grainy or sandy texture you experienced.
- Use Low Heat: The recommended method is to use gentle heat, just enough to soften the Shea Butter until it reaches a creamy, semi-solid consistency, rather than a fully liquid oil. Aim for a temperature around 40-45°C.
- Gentle Melting: You can achieve this by using a double boiler or a water bath on low heat. Stir gently as it softens.
- Pouring: Once it has a smooth, creamy texture, you can pour it into your containers.
- Cooling: Allow the filled containers to cool and solidify at room temperature. Avoid putting them in the refrigerator or freezer, as rapid cooling can also contribute to crystallization and a grainy texture.
By using a lower melting temperature and allowing it to cool naturally, you can help maintain the smooth texture of the 100% Shea Butter when repackaging.
Related Products Mentioned
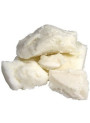
Shea Butter (Refined , Deodorised)
Cosmetics
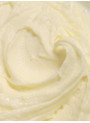
Shea Butter (Ultra Soft)
Cosmetics
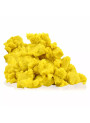
Golden Shea Butter (Virgin, Ghana)
Cosmetics